13: Patterns
- Download code
- 13-patterns.zip
- Live example
- examples/13-patterns/index.html
Until now, every shape in our world is a single solid color. In this section, we’ll see how to create different kinds of materials so we can create objects with patterned finishes, like stripes, rings – and the famous chessboard pattern.
A pattern works by extending Material and returning different colors for different points, depending on those points’ coordinates.
Stripes
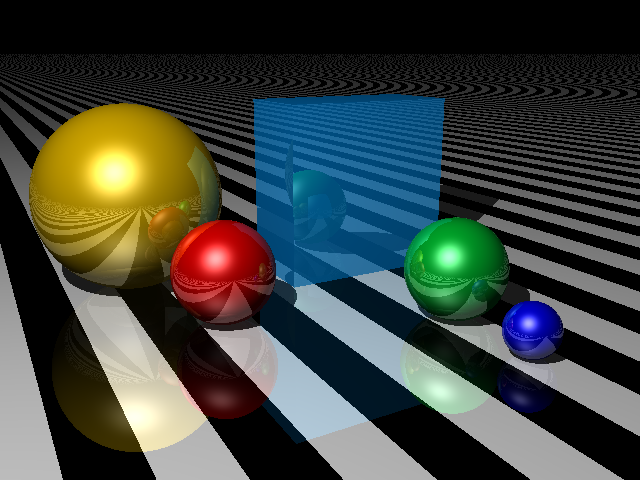
First, we’ll create a striped pattern. Stripes are exactly 1 unit wide, and run parallel to the Z-axis; to create a stripe pattern, we specify two colors.
// modules/patterns/stripes.js

import { Material } from '../material.js';

export class Stripes extends Material {
    constructor(color1, color2) {
        super();
        this.color1 = color1;
        this.color2 = color2;
    }
    getColorAt = point => Math.round(point.x) % 2 == 0 ? this.color1 : this.color2;
}
To create a striped shape, we pass a new Stripes into the Appearance constructor:
var plane = new Plane(
	Vector.Y,
	0,
	new Appearance(
		new Stripes(Color.Black, Color.White),
		new Finish({reflection: 0.1, diffuse: 0.7, ambient: 0.1 })
	}
);

Chessboard
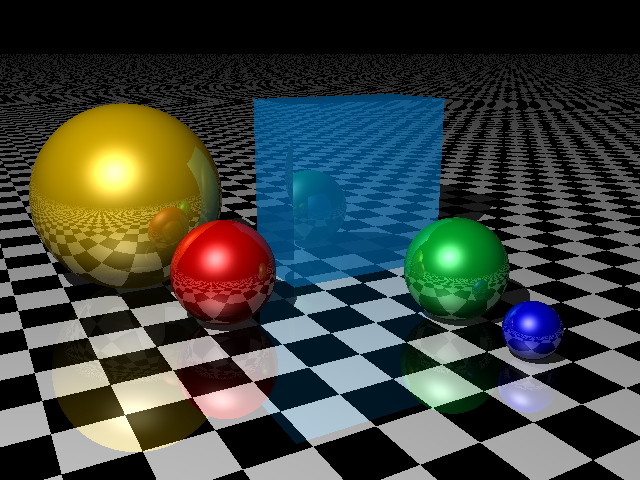
The chessboard pattern uses the same principle as stripes, but we need to look at both the x and z coordinates to decide which color to return.
// modules/patterns/chessboard.js

import { Material } from '../material.js';

export class Chessboard extends Material {
    constructor(color1, color2, size = 1) {
        super();
        this.color1 = color1;
        this.color2 = color2;
        this.size = size;
    }
    getColorAt = point => {
        let rank = Math.floor(point.x/this.size);
        let file = Math.floor(point.z/this.size);
        let light = ((rank ^ file) & 1) == 1;
        return (light ? this.color1 : this.color2);
    }
}

export class Chessblock extends Material {
    constructor(color1, color2, size = 1) {
        super();
        this.color1 = color1;
        this.color2 = color2;
        this.size = size;
    }

    getColorAt = point => {
        let rank = Math.floor(point.x/this.size) % 2;
        let file = Math.floor(point.z/this.size) % 2;
        let alti = Math.floor(point.y/this.size) % 2;
        let light = ((rank ^ file ^ alti) & 1) == 1;
        return (light ? this.color1 : this.color2);
    }
}
As with Stripes, we need to specify two colors when creating a Chessboard pattern:
var plane = new Plane(
	Vector.Y,
	0,
	new Appearance(
		new Chessboard(Color.Black, Color.White),
		new Finish({reflection: 0.1, diffuse: 0.7, ambient: 0.1 })
	}
);

Tiles
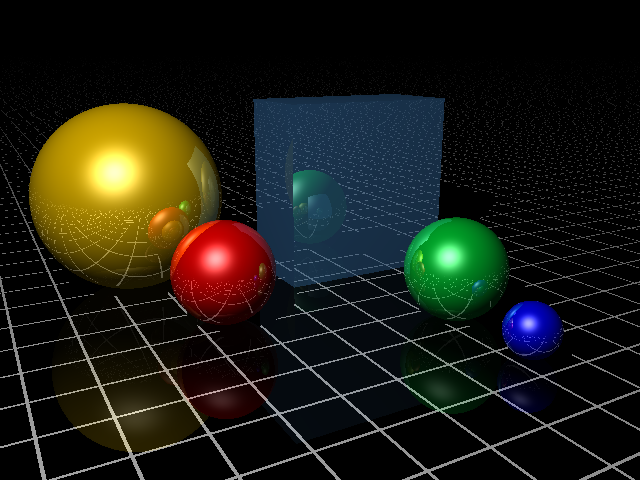
Tiles render as a repeating pattern of rectangular blocks surrounded by a uniform gap. To create tiles, we specify the width, depth and height of a single brick, the thickness of the mortar between the tiles, and the colors of the tiles and the “mortar” that fills the gaps:
// modules/patterns/tiles.js

import { Material } from '../material.js';

export class Tiles extends Material {
    constructor(size, spacing, color1, color2) {
        super();
        this.size = size;
        this.spacing = spacing;
        this.color1 = color1;
        this.color2 = color2;
    }
    getColorAt = point => {
        let xs = this.size.x + this.spacing;
        let ys = this.size.y + this.spacing;
        let zs = this.size.z + this.spacing;
        let xx = (((point.x - xs / 2) % xs) + xs) % xs;
        let yy = (((point.y - ys / 2) % ys) + ys) % ys;
        let zz = (((point.z - zs / 2) % zs) + zs) % zs;
        if (xx < this.spacing || yy < this.spacing || zz < this.spacing) return this.color2;
        return this.color1;
    }
}
Here’s a tiles pattern used as a floor in our reflection example:
let tiles = new Appearance(
	new Tiles(new Vector(1, 1, 1), 0.05, Color.Black, new Color("#fff")),
	new Finish({ ambient: 0, diffuse: 0.7, reflection: 0.2 })
)

- Download code
- 13-patterns.zip
- Live example
- examples/13-patterns/index.html